Replacing a mobile screen is a common repair that many users attempt on their own, especially when dealing with cracked, shattered, or unresponsive screens. Whether you’re a DIY enthusiast or just looking to save money, this guide will walk you through the process of mobile screen replacement in a step-by-step manner.

Tools You Will Need for Mobile Screen Replacement
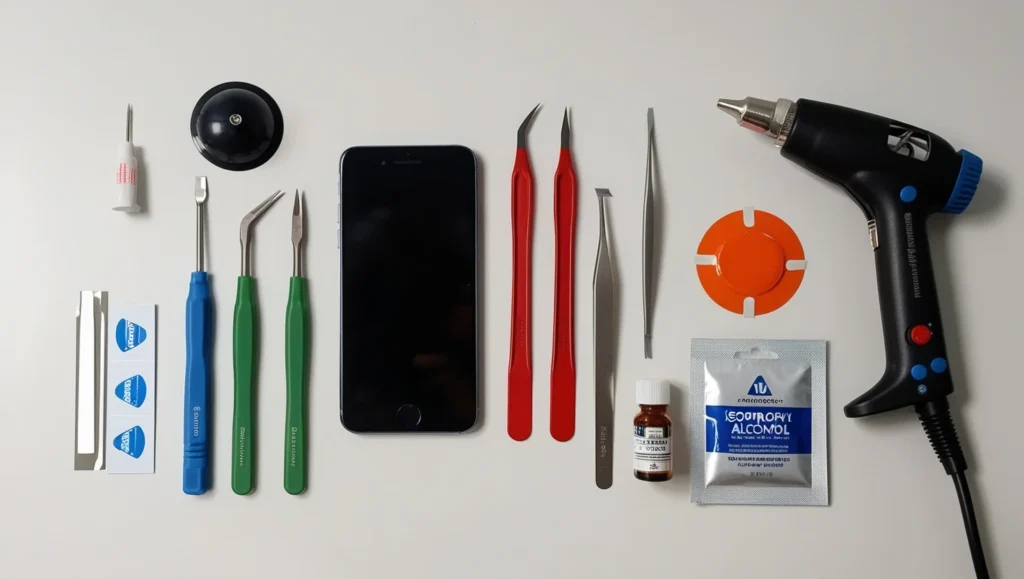
Before you begin, make sure you have all the necessary tools and materials. These include:
- Replacement screen (make sure it’s compatible with your phone model)
- Pentalobe screwdriver
- Plastic pry tools
- Suction cup tool
- Tweezers
- Heat gun or hair dryer
- SIM card ejector tool
- Screen adhesive (if necessary)
- Isopropyl alcohol (for cleaning)

Step 1: Power Off Your Device Before Mobile Screen Replacement
The first step in the mobile screen replacement process is to power off your phone. This is important for safety and to prevent any electrical issues during the repair.
Step 2: Remove the SIM Card Tray
Use a SIM card ejector tool to remove the SIM card tray from your phone. This step ensures that you don’t accidentally damage the SIM card slot while working on the phone.
Step 3: Heat the Edges of the Screen
Use a heat gun or a hairdryer to heat the edges of the screen for 1-2 minutes. This will soften the adhesive, making it easier to remove the screen.
Tip: Be cautious not to overheat the screen, as excessive heat can damage internal components.
Step 4: Use the Suction Cup Tool
Place the suction cup on the screen and gently pull to create a gap between the screen and the body of the phone. Once a gap is created, insert a plastic pry tool into the gap and carefully work your way around the edges to detach the screen.
Step 5: Unscrew and Disconnect Internal Components
Once the screen is detached, use a pentalobe screwdriver to remove screws securing the internal components. Carefully disconnect the battery, front-facing camera, and any other cables connected to the screen. Use tweezers for delicate connections.
Step 6: Remove the Damaged Screen for Mobile Screen Replacement
Once all internal components are disconnected, remove the damaged screen completely. Make sure to handle the screen carefully to avoid injury from broken glass.
Step 7: Prepare the New Screen for Mobile Screen Replacement
Before attaching the new screen, clean the surface where the screen connects. Use a small amount of isopropyl alcohol and a microfiber cloth to remove any dust, fingerprints, or residue from the phone body.
- Read More – How to Choose the Right Tools for Mobile Repair
Step 8: Install the New Screen for Mobile Screen Replacement
Align the new screen carefully with the phone’s body and reattach the internal components, such as the front-facing camera and other connectors. Ensure all cables are securely connected, and use the screws you removed earlier to fasten everything back in place.
Step 9: Test the Screen After Mobile Screen Replacement
Before sealing the phone back up, power it on and test the screen to ensure everything is working properly. Check the touch functionality, display clarity, and responsiveness.
Step 10: Reassemble and Secure the Screen After Mobile Screen Replacement
Once you’re satisfied that the screen is working properly, reassemble the phone. If the screen uses adhesive, apply a thin layer to secure it. Use your pantalone screwdriver to tighten any screws that may have been removed earlier.
Step 11: Final Check and Power On After Mobile Screen Replacement
Finally, power on your device and check all the functionalities again, including the display, touch responsiveness, and camera. If everything looks good, you’ve successfully completed the mobile screen replacement!
Tips for a Successful Mobile Screen Replacement
- Take your time: Don’t rush through the repair process. Being careful with the screws and connectors can prevent damage to the phone.
- Use quality parts: Make sure to use high-quality replacement screens that are compatible with your phone model for better durability and performance.
- Avoid static: Static electricity can harm your phone’s internal parts. Make sure to ground yourself before starting the repair.
- Backup your data: It’s always a good idea to back up your phone’s data before beginning any repair work.
Common Problems After Mobile Screen Replacement
- Unresponsive touch screen: This could be due to poor connection of cables. Ensure that all connectors are properly attached.
- Display issues: If the display isn’t working as expected, check for loose connections or a faulty replacement screen.
- Screen not sticking properly: Make sure to use the correct adhesive or tape for a secure seal.
Mobile Screen Replacement FAQs
How do I know if I need a mobile screen replacement?
If your phone screen is cracked, shattered, or unresponsive to touch, it’s time for a mobile screen replacement.
Can I replace my phone screen myself?
Yes, with the right tools and instructions, you can perform a mobile screen replacement yourself. However, it requires care and patience.
How much does a mobile screen replacement cost?
The cost of a mobile screen replacement varies depending on the phone model and the quality of the replacement screen. Typically, it ranges from $20 to $300.
What tools do I need for a mobile screen replacement?
You’ll need a replacement screen, pentalobe screwdriver, suction cup tool, plastic pry tools, and adhesive for a mobile screen replacement.
Is it safe to replace my mobile screen?
Yes, as long as you follow the correct steps and use the right tools, mobile screen replacement is safe. If unsure, consider seeking professional help.
Conclusion
Mobile screen replacement can be a rewarding and cost-effective way to extend the life of your phone. However, it’s important to approach the repair with patience and the right tools. If you’re unsure about doing it yourself, consider seeking help from a professional technician.
By following this step-by-step guide, you can successfully perform a mobile screen replacement and get your phone back to its optimal condition in no time!

[…] More: Step-by-Step Guide for Mobile Screen Replacement […]